Showing posts with label DIY How-To. Show all posts

Thursday, September 2, 2010

Veil Variations

You may remember my veil tutorial. I've been getting some questions about variations lately, so I thought I'd post a conceptual tutorial-- i.e., one that I have not actually done myself, but should work in theory. Please excuse the lovely Microsoft Paint images (some of the text may be too small-- I will translate).

Let's start with a veil with a blusher. You'll need to work out the measurements for what length of veil you want based on your height. Here's a handy chart explaining the various lengths and some pointers on picking the best one for you.

You'll also need to decide how long you want your blusher. You can play with the length by pinching the tulle in your fist and holding your fist on top of your head, then adjust to the ideal length and mark the tulle for sewing.

Once you've worked out the right length for you and cut the tulle to match, lay out your tulle:


You'll want to eyeball a straight line where you marked for the blusher. For the purposes of this tutorial, I'm assuming about 2/3 of the length of the tulle will be the actual veil, and 1/3 will be the blusher.


Fold your tulle back along the line.


And once it's flat and lined up so it's relatively straight, put in your running stitch.


Pull the stitch to gather and continue as per my first tutorial. The only difference would be to make sure that the blusher is on the top, so when you sew the tulle to the top of the comb make sure the blusher is the uppermost layer.


Now, if you want a veil with a rounded edge and a blusher, you may want to round the edges first. Lay out your tulle on a flat surface and fold in half lengthwise. You can use some pins to hold the tulle together so the corners stay lined up.


Using a round table or other gradual curve, trim both ends of the veil like this:


Unfold, and now you're ready to fold the blusher over and sew in the running stitch.


Edging is a whole other story-- I may or may not experiment with it on my own. I will, however, be tea-dying my veil to match my dress soon, so stay tuned for that!

Do you have any DIY veil pointers to share?

(All images belong to me).

Friday, August 13, 2010

A Flower For The Moms, Part I

In case you don't remember, I'm doing my own flowers. Why not? It worked out for Sister A., and it was actually a really fun activity for us girls to do the day before the wedding. It was a nice calm amongst the chaos, and I'm really looking forward to sitting down with my girls and building our bouquets together.

My sister did buy custom corsages for the moms, though. I was prepared to do this, too, until I saw Miss Earrings' great post about fake flower corsages, and the light bulb was on.

I've already made my hair flower, so corsages should be a snap. And they were! I've decided to post how I did it even though it's not that different from a hair flower, just to give you an idea of my methods.

This post is just about the de-construction and re-construction. I'll show how to make the wrist loop in another post.

You'll need:

-Fake flower of your choice
-Hot glue gun
-Heavy duty wire cutters
-Tulle scraps, I used a roll I got at Michael's in the wedding section in ivory
-Pearls or beads for the center

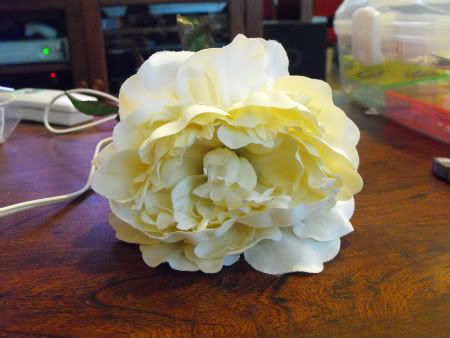
I scoured the fake florals in Michael's for what felt like hours until I found a good candidate. A big, poofy flower? Check.


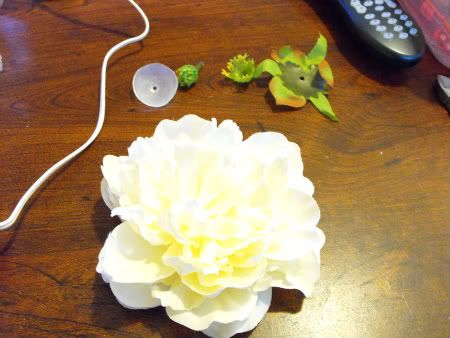
You'll need to cut the flower off of the stem pretty close to the hips (leaves just under the bottom petals), but be sure to leave at least an inch so you have something to grab on to.

It takes a bit of work, but pull the hips/base of the petals down the stem until you get it off. Once you get that first part off, it should be pretty easy to get the petals off.


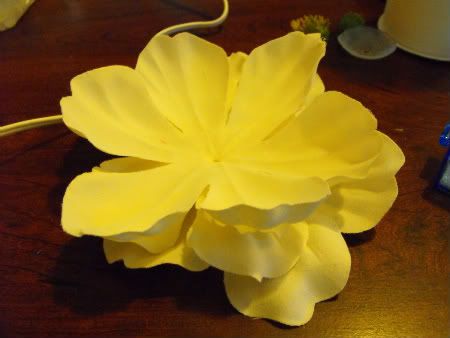
Take all the layers apart and take out any plastic pieces separating the petals. You will be left with a slightly-less poofy flower.


I chose to leave out the biggest bottom layers of petals as this was a rather large flower.


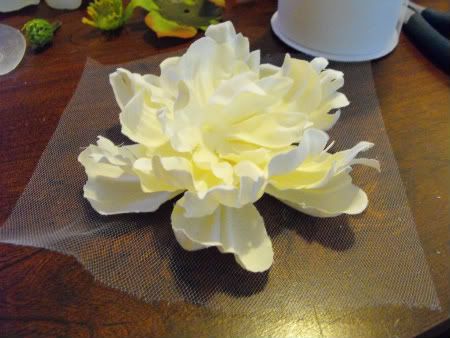
Cut out a square piece of tulle, slightly larger on all sides than your flower.


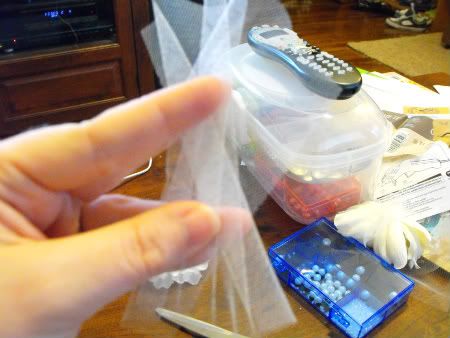
Fold it like a fan. I've got mine like a twisted fan, because I thought it looked better, but just do whatever you like.


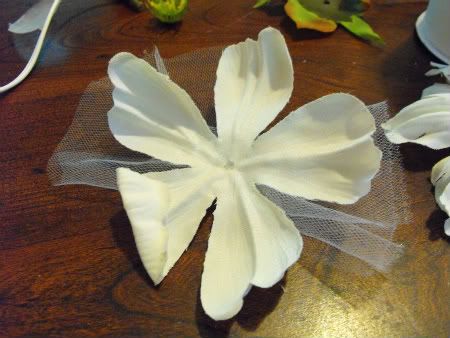
I don't recommend you do this next part like me unless you enjoy burnt fingers. Use your hot glue gun to glue the bottom layer of the petals you're using in the corsage onto the tulle. I just did a small dot in the middle and that was fine, aside from the burning.


Keep gluing petals in ascending order. I added a few smaller squares of bunched-up tulle in between layers, to give the petals some lift and add some more texture to the flower.

Pro tip: To add more dimension, put a small dot of glue on the base of each petal of a new layer before gluing it down, then bunch the flower together while you set it in place. Hold it for a few seconds to let the glue cool before letting it go.

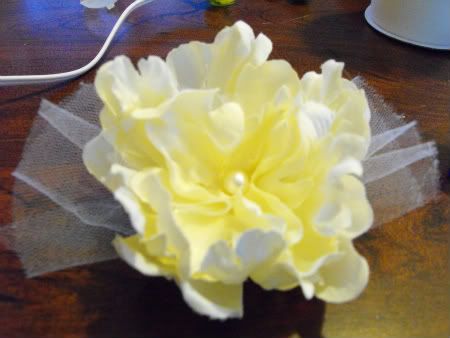
Once you reach the middle, glue a pretty pearl in the center where the plastic stamen used to be.


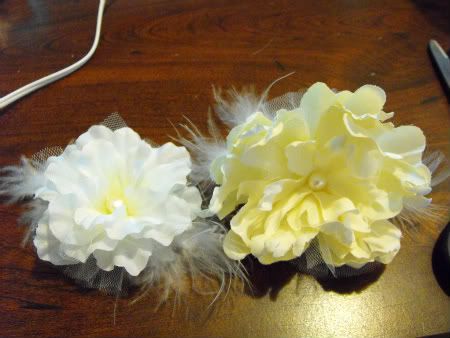
Trim the edges of the tulle close to the flower and add a few feathers if you wish. Ta-da! Some gorgemous flowers for the wrists of our mothers.

I'd originally planned to get a dark orange flower for my mom, but was unable to find one I liked. I used a flower that I already had at home (it might look familiar, in fact), but it's quite a bit smaller than the other one, so I will probably keep looking for another.

And there you have it. The flower tutorial I never thought I'd write. It's so easy, in fact, that I've decided to make the boutonnieres for the guys, too.

Part II with the wrist loop coming soon!

Would you consider fake corsages?

A Pillow For My Nephew

My nieces, who live across the country from us, are seasoned wedding pros, and I'm fully confident that they won't need any direction from me.

Their little brother, my three-year-old nephew, is adorable, sweet, and charming. He was born with a rare chromosomal disorder, but he doesn't let it get to him. Despite limited mobility and some developmental issues, he is the most amazing little guy, and I hope he'll be able to handle the pressure of being our ring bearer on our wedding day.

The thing is, I don't think anyone will know if he's okay with all the attention and the lonely walk until it's time to do it. But that's not a concern-- I'm totally fine if mom and dad (Sister S. and her husband) carry him down the aisle.

I'm not even sure if he will manage to hold onto anything on his trip down the aisle, but I wanted to give him something just in case. But all the ring-bearer pillows I had seen were devoid of my color-and-detail loving personality, like this:

Source

Although, looking through David's Bridal's website just now while hunting for this picture, they do have some newer, more colorful ones. Hmph. I still stand by making my own since it was less expensive. Moving on.

So here's what you'll need to make your own ring-bearing pillow (fabric will vary depending on the kind of design you want):

-Two 1-foot square pieces of a sheer fabric of your choice
-Two 1-foot square pieces of a solid fabric of your choice (satin or lining fabrics work well for this)
-3-foot length of a complimentary ribbon
-Pins
-Fabric scissors
-Sewing machine or needle and a steady hand
-Color-matched thread
-Loose cotton batting/stuffing
-One pearl (optional)
-The second season of Futurama, if you're so inclined


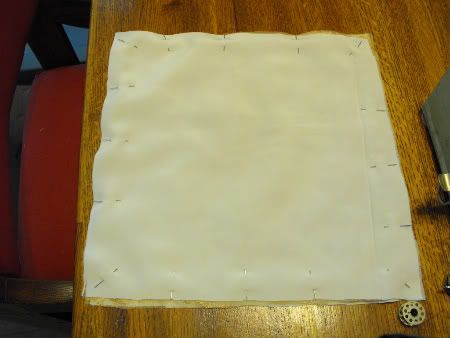
Start by sandwiching your four pieces of fabric together. This part can be tricky if you're not used to sewing. Basically, you want an inside-out sandwich. The easiest trick I use is to make two piles of fabric, with the solid material on the bottom and the sheer fabric on top. If your sheer fabric has embroidery, be sure to put it right-side-up onto the piles.

Then you take one pile and turn it over and put it face down onto the other, face up pile. Phew. Make sense?


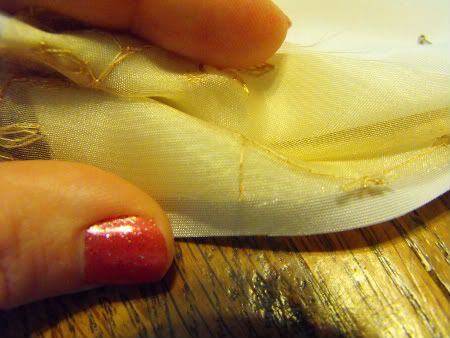
Here you can see the details of my fabric sandwich. Yum.


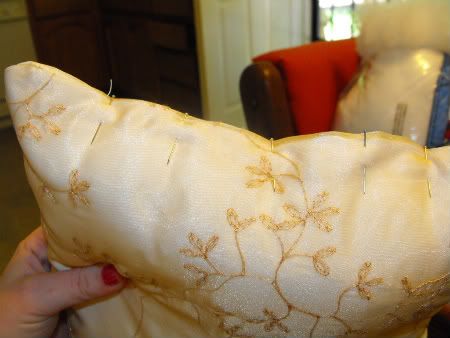
Once you have your fabric stacked the right way, pin it together on all four sides. You're only going to sew three initially, but you want the stability of all four.

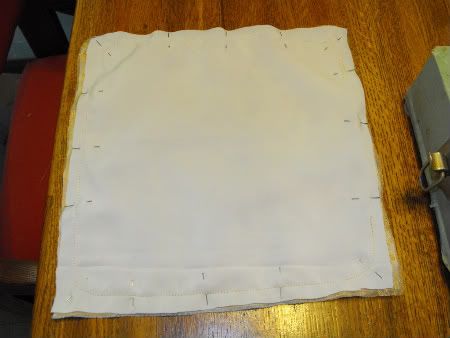
Go ahead and sew three sides and about an inch or two on either end of the fourth. I'll wait.


Okay, so: once you've done that, flip your pillow inside out (take the pins out first). I like to stick my fingers in all the corners and make sure they've popped out and that it's mostly square. If it's not, you can always flip it back again and re-sew to correct the shape.

Once it passes muster, stuff it up to your preferred level of squishiness with the cotton batting.


Fold the open edges over and pin the hole shut.


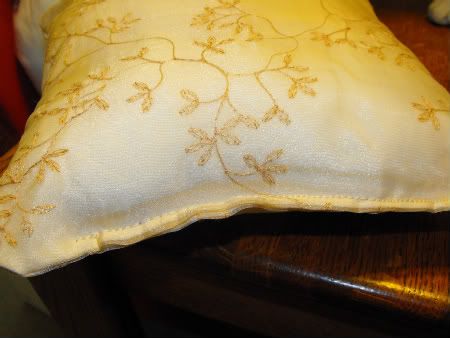
Sew it up as close to the edge as you can and take out the pins. Check to make sure you sewed the whole opening.


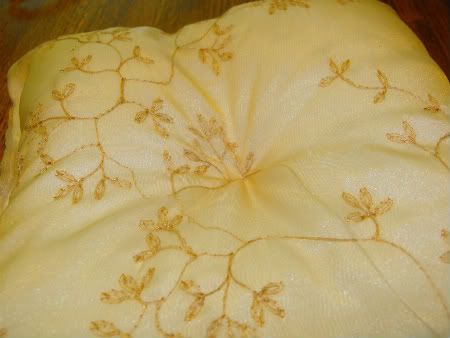
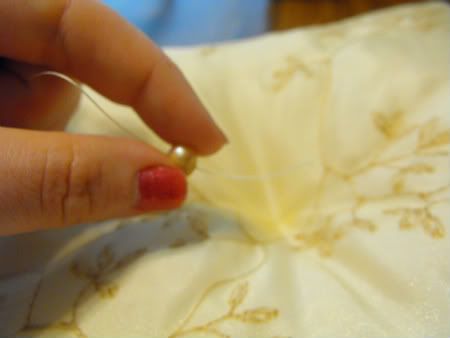
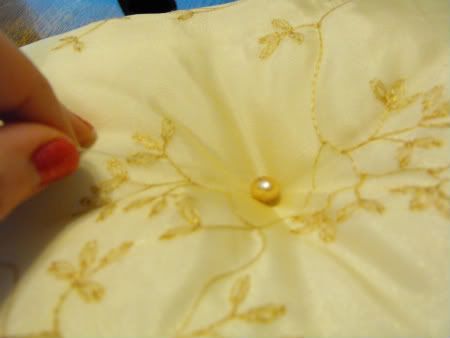
Thread a needle and knot one end. Shove it through the middle of the pillow and out the other side. Do this a few times, pulling the thread tight each time, until it stays. This will draw the middle together and give it that pinched effect.


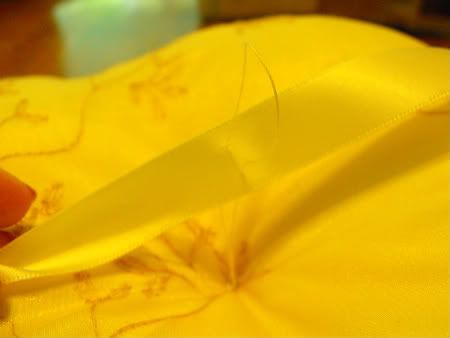
Find the middle of your ribbon and put a stitch through it on whichever side of your pillow you want to be the top. Sew it through the pillow a few times.

Pro tip: Use a thin bead of regular craft glue on each end of the ribbon to keep it from fraying. Let it dry before you sew it to the pillow though.


On the other side, you can string up the pearl and sew it tight.


To finish it off, pull the thread tight and either knot it as close as you can (difficult) or hot glue it down (messy). I went with knotting.


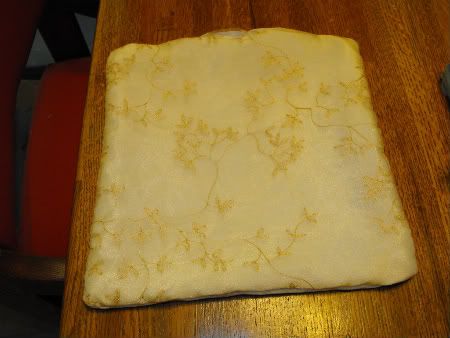
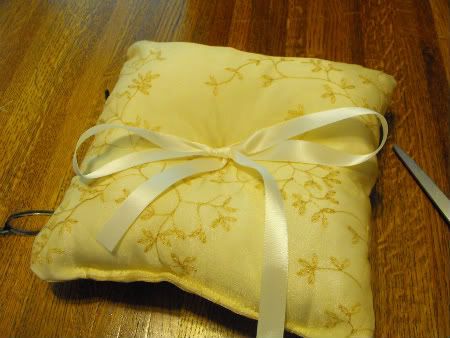
Tie the ribbon in a pretty bow and voila! A pretty, personal ring pillow of your very own.

This took me maybe twenty minutes from cutting the fabric to tying the bow in the ribbon, and I don't consider myself an advanced sewer (though my first attempt at apparel is on the horizon, yikes!)

I can't wait to see what my nephew does with it!

What projects have you been driven to do yourself because you didn't like what was out there?

(All pictures in this post are my own unless a source is noted).

Monday, August 9, 2010

Emboss it!

This is going to sound like some silly hair-accessory commercial (hence the worthy title). I've had a couple requests to describe how I managed to emboss my own handwriting, and so here it is:

This is actually super simple, but it took me a while to think of it. I was so used to using stamp images that it never occurred to me I could emboss anything else.

Here's the supply list:

-Paper, or whatever you're going to emboss
-Embossing powder (can be found in the stamping aisle of any craft supply store)
-Embossing heat gun -or- hair dryer with low setting
-Gel pen, preferably in a color to match the embossing powder (I used a metallic red one without any issues)


Take the pen and write whatever you're going to emboss on the paper. I somehow magically forgot to document this step, of course.


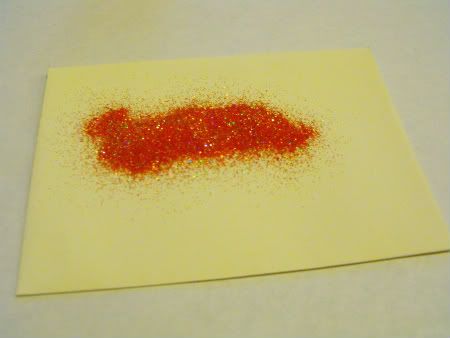
Sprinkle your writing with the embossing powder. I prefer a generous sprinkling because it fills all the cracks and details that way. Be sure to have your embossed surface on a spare piece of paper to recover the powder after the next step.


Dump the powder off onto the spare piece of paper. I usually flick the embossing surface a few times with my finger to get any extra off.

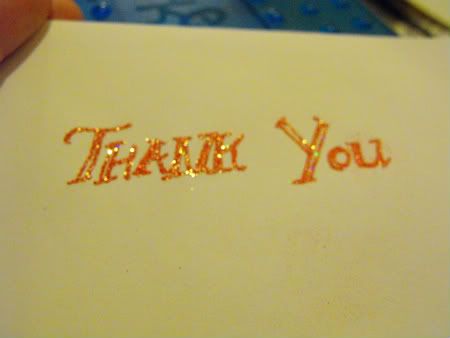
Take your embossing heat gun or hair dryer set on low and gently wave it back and forth over a small area of the embossing powder until the powder changes color and melts. You don't need to let it melt for very long; depending on the color of the powder, 5 seconds should be more than enough time. You'll need to move it slowly to other sections until the whole design is melted. And here's the final result, though as a quick-and-dirty sample, it's not my best work!


This is one of the bridesmaid gift boxes I've been working on. I made the floral image with a stamp and then wrote in the empty space and embossed their names on the boxes, too. I am quite pleased with this technique! It's a very easy way to make your handwriting pretty and permanent, without the smearing concerns of just using a gel pen.


Pro tips:

-WARNING: You will get sparkly stuff everywhere.
-With darker/ brighter colors of powder, be wary of tiny leftover spots on the surface after you flick off the powder. If you want your final product to look smoother, you may need to go through and gently rub them off. I found that this red powder sort of stained the paper in some places.
-If your embossing powder is heavy on the glittery stuff, you may not be able to see the powder change color when it's melted very easily. There's a very brief moment when it will sink down and darken, be sure you keep your eye on it!

What have you discovered that should have been a "duh"?

(All pictures in this post my own).