Showing posts with label The Wishing Well. Show all posts

Friday, March 12, 2010

The Wishing Well, Part V-- Putting It All Together, At Last!

We're nearly there! So close to a cute, finished, personalized wishing well!

This project really wasn't as much of an undertaking as I thought it would be, but-- to be fair-- it still was pretty intense. I understand this has not been an everyone-can-cook sort of tutorial, but I hope someone out there learned something, or is able to re-create these results with minimal trouble. After all, I'm not exactly Martha myself. Yet.

Supplies:

-Everything you've done to the wishing well so far: the well itself on its newly-mossed (yes!) base, the bucket, the roof.
-Another ~7" piece of 1/4" dowel, plus a small scrap (see below)
-Wooden axle pegs (found in the same section I got my wooden circles for the bucket, and here)
-Two more of the wooden circles used to form the base of the bucket
-Cutting mat
-Hobby knife
-Aleene's Fast Grab Tacky craft glue
-Twine or hemp jewelry rope to use as a "rope" for your bucket
-Drill with 1/4" bit
-Dremel with routing bit (?-- this is admittedly the part S. helped me with and therefore, I have no idea what it's actually called) and cutting/ sawing blade
-If you are afraid of power tools like I am, get someone who isn't to help you. Preferably of the fiance-cial persuasion, but only so he gets to help.

And here we go. Mark the dowels in the well to the same height, leaving enough room to put the roof on and still reach your hand all the way down into the foam pit below (so you can get the wishes out).

Use the Dremel to cut the dowels off at these marks. I recommend some sort of power tool without too much vibration or interference as sawing them by hand could break them out of the clay. The Dremel worked without a snag.
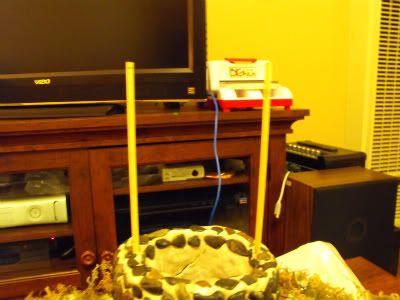


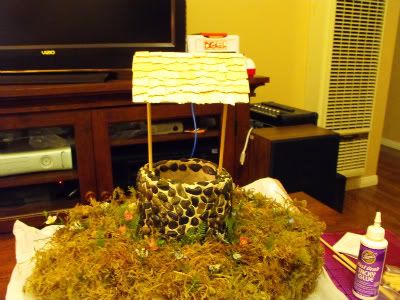
Add some glue into the clay pieces into the roof (you may also have to glue the clay pieces into the roof themselves once they dry-- mine shrank ever so slightly, and therefore needed to be glued). Stick the dowels in and align the roof into its final position.


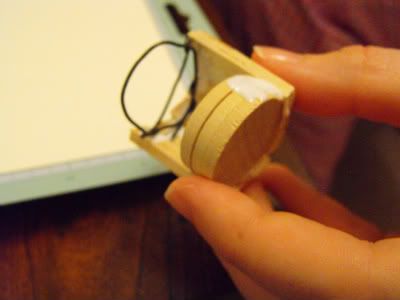
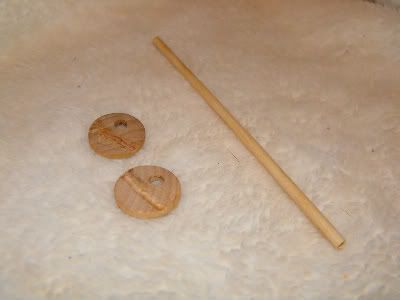
Cut the piece of dowel for the bucket pulley if you haven't already (the 7" piece mentioned above). I also had S. drill a slightly larger than 1/4" hole off-center in two of the same wooden circles as I'd used to make the base for the bucket. I also had him use a routing/ carving bit on his Dremel to carve a channel in them so they would make more contact with the post dowels and be more secure.


Put glue in the channel and stick the wooden circle to the post until it stays without assistance. Though it's only pictured halfway here, do the same on the other side.
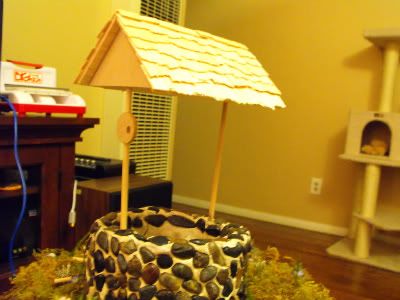


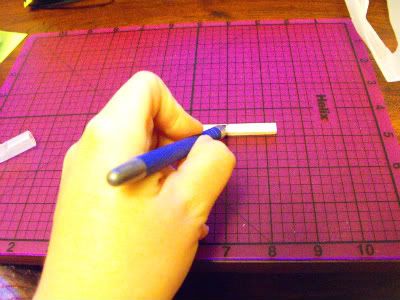
Here you can see I've cut a small piece of dowel (about 1/2-3/4") and notched it. I've also notched an axle peg (the funny little stick with the round button on the end). This is to make a handle so your bucket can be hand-wound. (Warning: you may also want to enlist the power tools to help with this. I used my hobby knife and The Force to do this, but I broke one blade! Be super careful if you go this route, and make sure you have a clear area so you can find the sharp pieces of blade if you do snap one. Wear eye protection, too).
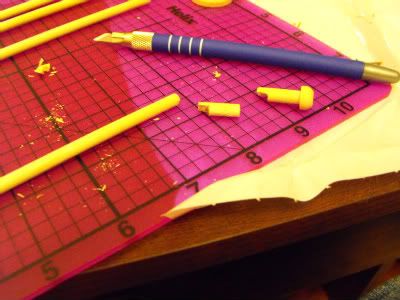


Glue the notch in the short piece of dowel to one end of the long piece of dowel.
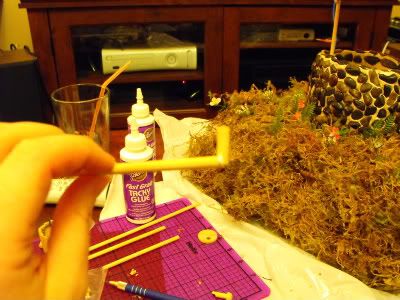


Once it's set, glue the notch in the axle peg to the un-cut end of the short piece of dowel.
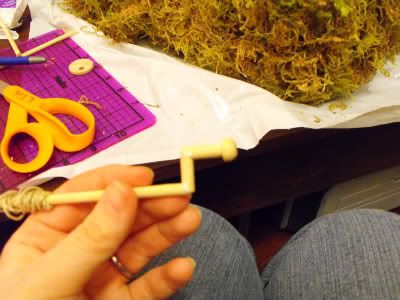

Ta-da! A tiny little crank. In the picture above, you can see I got a little too excited and started to wind my "rope" around the long dowel already. Don't do this.

Once I took the rope back off, I threaded the dowel through the first hole/circle, put the rope back on, and then threaded it through the second. At this point, it was super-loose and waaaay too long. The bucket wouldn't stay up and I was really worried about having to find a way to keep it up artificially.
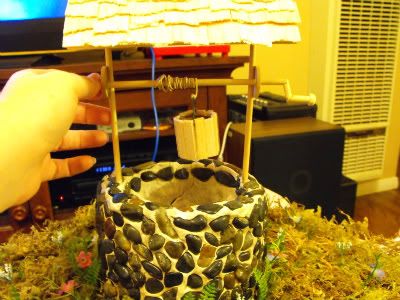


Luckily, I had the brilliant idea to measure and cut the dowel to a more reasonable length (after, yes, taking off the rope and then re-putting-it-back-on again. I'm a dweeb). I also sawed the button off of the end of another axle peg (again, I recommend power tools instead of stupid hobby knife. Stupid hobby knife took me about two years. I am 27 now. Gah.) and glued this to the loose end of the long dowel once it was back through (and the rope was back on, again).
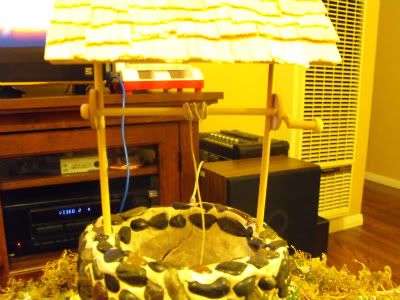

I had to sit and hold this for a good 15-20 minutes and turn it periodically so it wouldn't glue itself in one place, but once it grabbed, it turned out to be perfect! It was just tight enough that the bucket no longer plummets to its doom the instant you stop holding onto the crank-- it now holds itself up.

Ready to check out this uber-cuteness? Here you go!
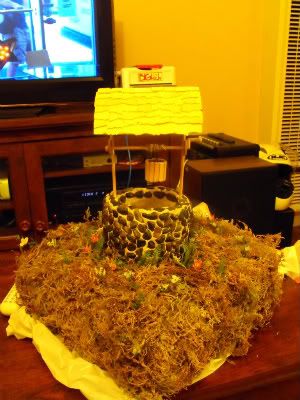

Sorry for the yellow color in the pics-- my camera is an animal unto itself sometimes.

Variations:

I may still do this one: there is the option of spraying all the wood with a varnish or paint wash before you put everything together to give it an older look. I'll do another tutorial if I do this after the fact.

Learn From My Mistakes:

This part went pretty smoothly. I can't really think of anything that made me want to scream or tear my hair out. Except my kittens screaming and trying to tear the moss out of the base... but luckily, I caught them in time.

Do you think you would ever do something this complicated from a tutorial? What do you think of my well? Does the wood need color, or is it okay as-is?

Wednesday, March 10, 2010

The Wishing Well, Part IV-- The Base

This part was by far the most tedious part of the well. It was still fun, but it was an exercise in patience. See, apparently, not all the pebbles on the outside of the well were pressed far enough into the clay. When I peeled the well off of the lazy susan to measure the hole for the foam (more about that in a minute), several of the pebbles came off. I had to spend about ten minutes searching for loose ones and gluing them back on. So, pro tip for the first part of the wishing well: add a dab of glue to each rock as you place it in the clay. It may take a little longer to dry but it will be SO worth it later.

All right, let's get this part on the road. We're almost done! (Yay!)

Supplies:

-I used one 3 ft. by 1 ft by 2 inch thick piece of white styrofoam. I saw this exact piece at Michael's and JoAnn's.
-I used Beacon's Hold The Foam glue, along with my now-old standby,
-Aleene's Fast Grab Tacky Craft glue (be warned-- I used almost a whole bottle on this part. Don't start this with only a partial bottle on hand).
-Floral decorating moss
-Fake flowers and ferns-- small enough or with small enough parts to be miniature and approximately in scale with the well
-Utility knife
-Steak knife
-Permanent marker
-Yard stick
-1-foot-square piece of cardboard
-An outdoor area and maybe a dust mask.


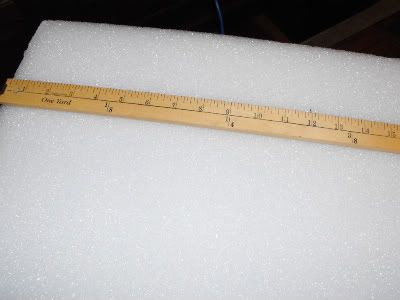
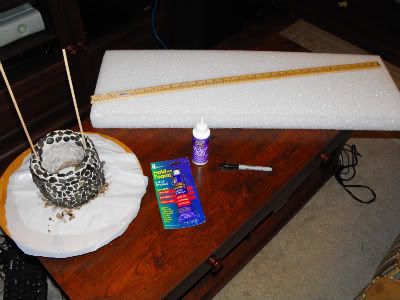
You can see most of the supplies here.


I measured and drew lines with the permanent markers to divide the foam into three 1-foot sections.


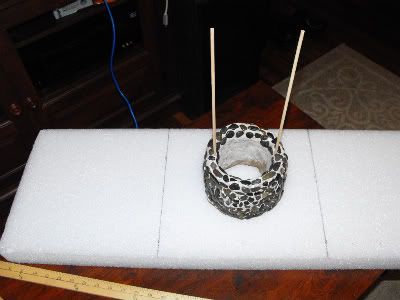
I set the well onto one of the sections to trace the inside of it with the marker onto the center of the foam. Doesn't matter which section.


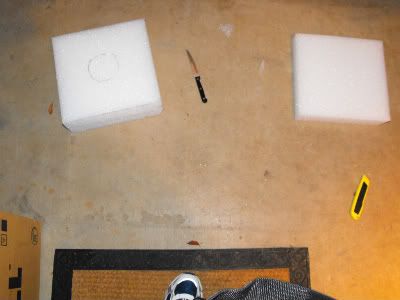
Then, I used the steak knife to cut the three big pieces apart. I only used two; you can use three if you really want it deeper but I think it would look unwieldy with the extra height. (I used the utility knife to cut the cardboard out).


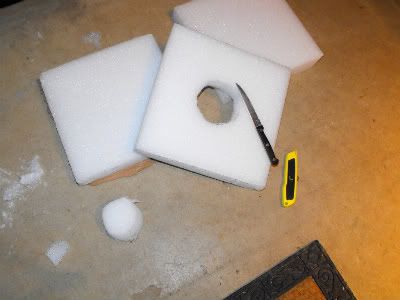
Then I sawed out the circle I'd traced on one piece of foam. You may have to do a little smoothing with the knife to get it even and not slanted. I didn't worry about making it look too pretty; hopefully it will be invisible. I traced the existing hole in the foam onto the second piece and cut that hole out too, checking a few times to see that the two holes mostly lined up and were fairly even.


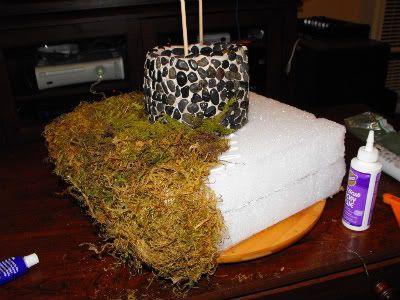
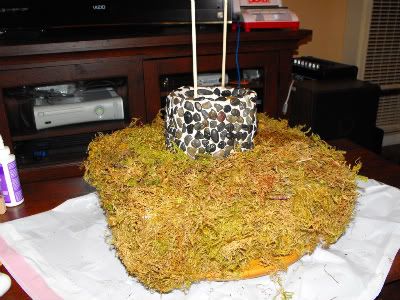
Then I made a sandwich. I glued one of the foam pieces with the foam glue to the cardboard square, thus making the bottom of the "well". Then I glued the other foam piece on top of the first one. Then I glued the well over the hole, all still with the foam glue. After this, I slathered a section of the foam in the Fast Grab tacky glue and started to tear pieces of moss (and also glue them, for added insurance that they would stick) and cover the foam with it.

I wish I had thought to spray paint the foam green beforehand. It would have made the whole "mossing" process much easier. Also, another note: the moss is very messy! It comes complete with dirt and sticks and leaves straight from nature. I suggest doing this outdoors or in an easily cleanable area, and in clothes you don't really care about.


And here we have the completely moss-ed foam.


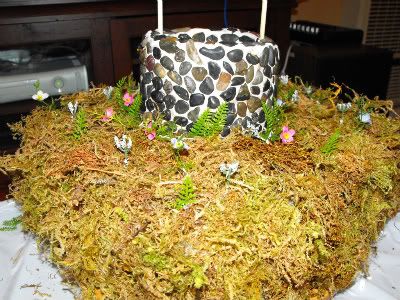
To finish, I just glued the ends of and stuck in little pieces of fake fern and mini flowers I found in the floral section at Michael's. Now it's growing! Yay!


Learn From My Mistakes:

-If I had to do this over again, I would spray paint the foam a similar green to the moss beforehand. There are little white places peeking out all over that I'm sure no one else can see, but are bugging me no end.
-I would have put a dot of glue on each of the pebbles as I stuck them in the clay the first time around instead of having to let them fall out and then glue them back in once it dried.
-I would have put down a trash bag to start with and not worn my clean PJ's while I was "moss-ing".
-I would find other places to use moss as a verb.

On Friday I'll finish this up. I can't wait to show you the final product!

Friday, March 5, 2010

The Wishing Well, Part III-- The Roof, The Roof

I'm so excited to keep sharing the wishing well. I love this project; it's been my favorite so far. And it's almost done! Stay tuned next week for the final touches. It's been a long road (though not nearly as long or as difficult as I thought it would be), but worth it.

Today, I'll show you how to make the roof. For this, you'll need the following.

Supplies:
-Cutting Mat
-Hobby Knife
-Thin Balsa; I used the thin 3"x5" "planks" in my handy-dandy balsa grab bag I picked up at Michael's, but I know some stores sell these in larger sizes-- you can cut it down to size yourself really easily. I chose balsa because, even though it's a very weak wood, it's lightweight (therefore reducing the possibility of structural overload) and I could cut it/ manipulate it myself really easily-- no power tools needed.
-Glue-- I used my now-favorite Aleene's Fast Grab Tacky craft glue
-A small box
-Saran wrap
-A glass of Sangria
-Movie of your choice: I watched 27 Dresses (again, I confess!) while doing this.

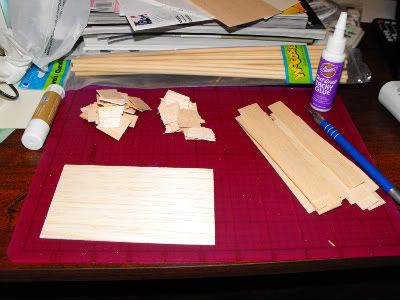
First, I took a few of the planks and broke them up to make shingles. I started by breaking them along the grain in long strips, and then breaking the long strips into pieces about 3/4" long. Don't worry about the ragged edges, unless that's the look you're going for. You could also cut these if you wanted them straight; breaking was faster for me and more in the style I was going for.


You can see the long strips to the right and the growing pile of shingles in the back. I made a LOT of shingles, and still had to stop and make more about 3/4 of the way through. Overestimate how much wood you'll need.


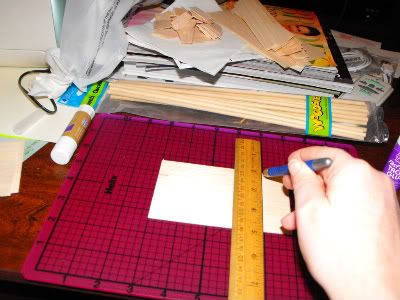
Then I made the base for the roof. I measured my well and figured I'd need about a 6" span to cover it from side to side. My planks were only 5" long, so I had to cut and add a 1" piece to them.


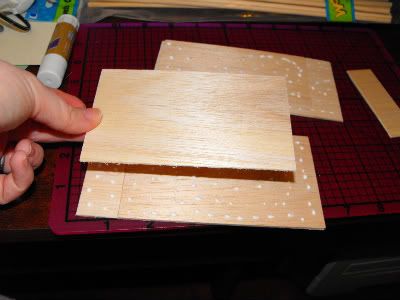
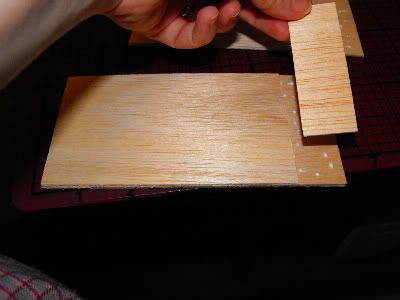
I was going to stack them anyway for added strength, so I staggered the joints and glued three sets of 5" and 1" pieces to each other, with the 1" piece on opposite sides every layer. Note: Don't be shy with the glue! It will also add strength to the wood without adding much weight.


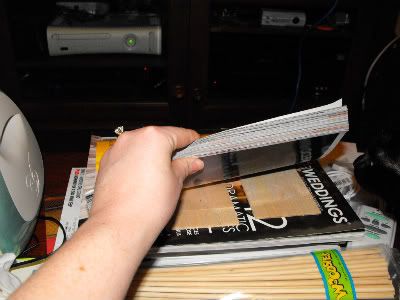
I made two stacks of three layers each, and placed them under some handy bridal magazines to keep them from warping while they dried for a few minutes.


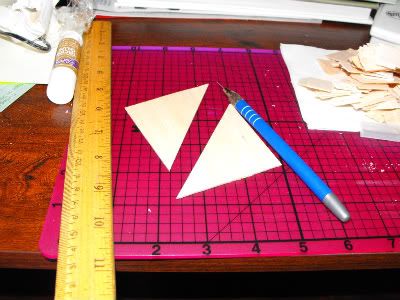
While they dried, I used another two planks to make two 3x3" squares, which I then cut in half to make four triangles. I glued these into stacks of two.


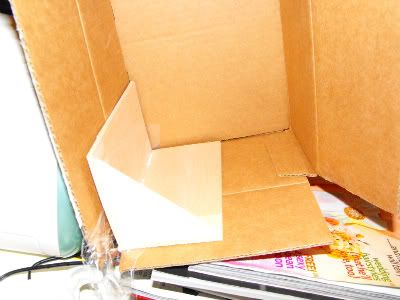
Then I went looking for something square to set this up in while the glue dried a little. It only took me about seven minutes to remember that boxes are, indeed, square. D'oh. I lined the inside of one corner with saran wrap to keep any leaking glue from adhering cardboard to the wood, and glued the two 6"x3" stacks together into a V. I then also glued in the triangles, one at each end. Make sure you glue these about a 1/2" or less from the edge; you want them to be on the outside of the post supports when you attach it to the well.


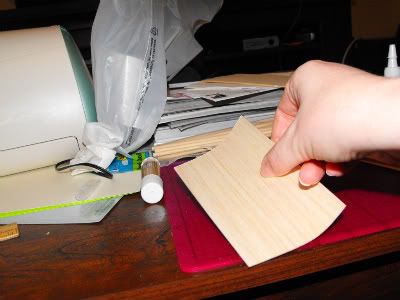
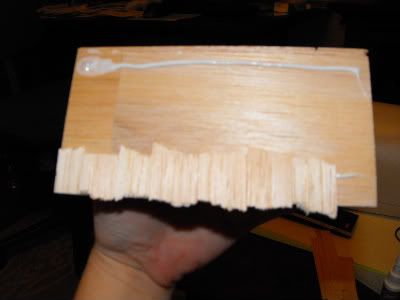
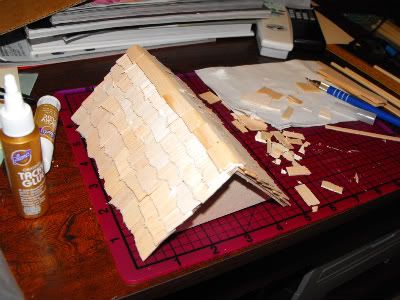
I let that sit for a good 45 minutes and then it was time for the fun part. I put a line of glue across one side and started gluing on shingles. Note: start at the bottom. I let the rough edges overhang the bottom just enough to hide the flat edge underneath, and let the upper rows overhang the lower ones as I worked my way up. I also didn't really have to worry about the shingles fitting on the roof too much; if I reached the end and needed a narrower one, I could just break it to size.


I did this for both sides all the way to the crest of the roof, and then broke some of the remaining shingles in half, but did not separate the pieces (so they were hinged). I glued these on to the top for a ridge and ta-da:


Mini-roof!

Coming up next week: More vendors, and putting the well together.

Thursday, February 25, 2010

The Wishing Well, Part II-- The Bucket

[Insert lolrus jokes here]

This, too, was pretty easy, though somewhat time consuming as I had to hold it all together while it dried. I suggest putting on a movie and having everything you might need for an hour within reach. Or a nearby friend (or fiance) who can take over if you suddenly have to pee.

Supplies:
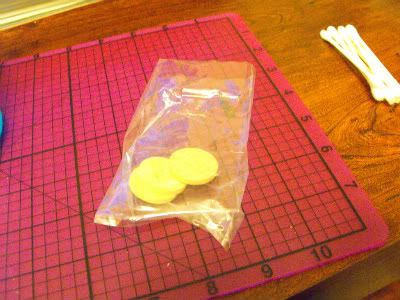
-Small wooden circles, about 3/4"-1" in diameter, or other depending on the size of your well. I got mine at JoAnn's, I'm sure Michael's or similar carries them as well, in the Small Wooden Things section.
-Sticks of balsa about 1/4" by 1/8", but really any rectangular cut of a soft wood would work.
-Aleene's Fast Grab Tacky craft glue. This stuff seriously made a HUGE difference in the amount of time I had to sit there and hold this together.
-Hobby knife and cutting mat
-Craft wire
-Pliers

First I took three of the wooden circles and glued them together into a little sandwich/burger/Oreo/ however you want to think of it. Not all of these were the exact same size, so when I wound up with two slightly larger ones and one slightly smaller one, I put the smaller one in the middle so the pieces of balsa wouldn't taper towards the top. These are the ones I used, you can see they are 1" in diameter.


While they dried, I took some of the craft wire and twisted it into a circle about the size of the wooden circles, but a little smaller-- so it would lie just around the outer edge. I twisted the ends around each other. Then, I took another small piece (about two inches long) and wrapped one end around the wire circle and bent it shut with my pliers, then did the same with the other end on the opposite side of the wire circle, and bent up the middle to make a handle for my bucket. I didn't take any pictures of this part because I needed eighty hands, but you'll see it in a minute.


I also began to cut up my balsa pieces into 1 1/4" strips. I tried to get the ends as even and flat as possible, but the unevenness of a few of them adds character to my bucket. Or at least that's what I'm telling myself.


Here you can see me holding the bucket about halfway through. This is why I used three wooden circles for the middle instead of one-- it made it WAY easier for the outer pieces to stay upright-- without the extra support, they wanted to sag all over the place. About halfway through, I also glued the wire circle in with the handle upright.

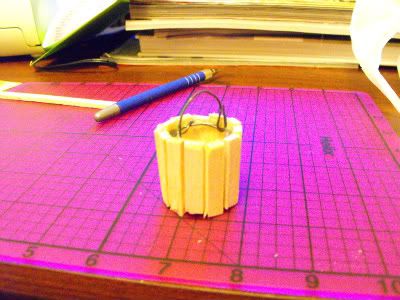
I kept gluing the sticks in place until I wound up with this:


Ta-da! A little tiny bucket. We loveses it, precious. . .

*Ahem*. I mean, it's cute. Yeah. (You'll notice I have a thing for mini and cute).

Notes: Once the outer planks were all in place, I glued the rest of the metal wire down, but then had to sit and hold the whole thing while it dried because the handle kept slipping down into the bucket and if I just let it, it would have dried crooked (and bugged me to no end), so I definitely recommend having some free time.

Learn from my mistakes:

-Give yourself plenty of time to let the glue dry between pieces of wood. Use a Fast Grab glue or similar to cut down on this time.

Variations:

-Well, there are plenty of variations. The main one I can think of is putting some wire around the outside once the whole thing has completely dried. A ring of wire on top and on bottom, twisted to put a little pressure on the balsa, would give it that authentic, strapped bucket look. I may still do this to mine. But, you will still need the internal metal ring for support and to attach the handle to.


Wednesday, February 24, 2010

The Wishing Well, Part I

This is kind of a long project, but so far it's been relatively simple, and we'll call it a labor of love. I was wandering around the blog-o-sphere a few weeks ago (still swathed in my Newborn Bride clothes) when I started seeing references to creative guest books at weddings. I'd seen the more traditional kind, as well as the ever-delightful signable picture mat kind, in person. At first, I was content to just do the signable picture mat. But then, as is wont to happen when you're me, I got an idea.

What better, cuter place to have guests write up their well-wishes and thoughts than... a wishing well?

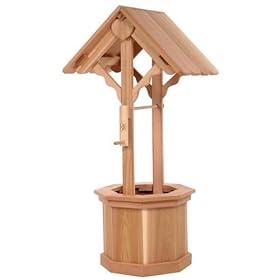
A quick internet search revealed that if I wanted a well that matched my vision for the wedding, I was going to have to build it myself. There's this lovely beauty on Amazon, but it's four feet tall!


Source

A lot of similar results popped up. Also, some small, cheap-looking miniature versions that were a.) too small, and b.) totally wrong. It's okay though, because I love a challenge, and when I explained to S. what I was thinking for making my own, he was all for it.

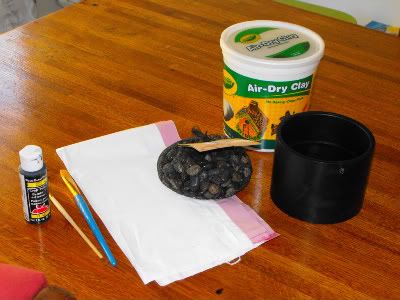
So, a trip to Michael's and Home Depot later, I had this at home:


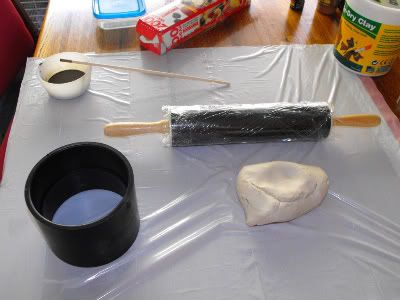
Supplies: A trash bag so you don't ruin your work surface, a bag of small river rock pebbles (you can use whatever type of rocks you prefer, but that's what I used for mine), a tub of air-dry clay, wooden dowels (not yet pictured, I used 1/4") black and brown craft paint (I used acrylic), paint brushes, and a 5" PVC piping thingamajig-I'm-so-sorry-I-don't-actually-know-what-it's-called. Found it in the PVC section of Home Depot, it's a connector of some sort and black, with a thin band running around the inside (this actually becomes important later). You'll also need saran wrap and a rolling pin (not pictured til later), and a lazy susan (optional).


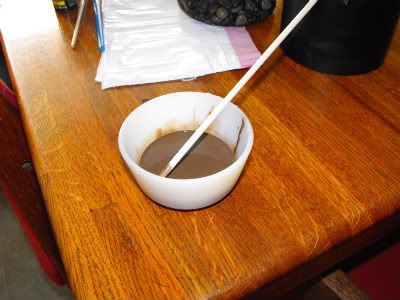
I also got a small dish and mixed together some black and brown paint and a few tablespoons of water (with one of my handy dandy wooden dowels, now pictured) to create a wash. You may want to wait to do this or cover it with some saran wrap so it doesn't dry out and thicken up while you're working.


I covered my rolling pin in saran wrap since it is primarily used for food, not crafting. I tore a chunk of clay out of the bucket and kneaded it to warm it up.


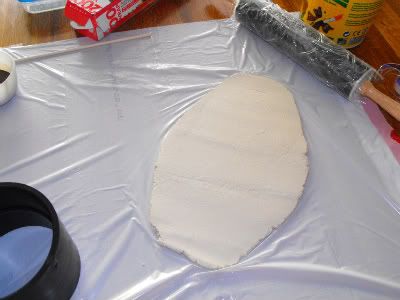
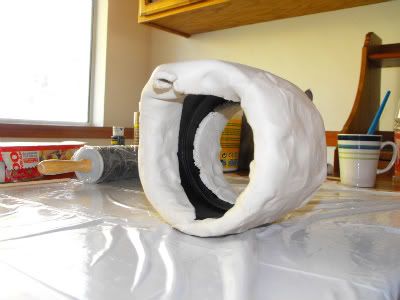
I rolled the clay out til it was approximately big enough to cover the outside of the black plumbing dealy. It was about 1/4 - 1/3" thick at this point.


I rolled it over and painted the ends with water so they would adhere to each other better (this is a super-duper secret of clay-- be sure to do this every step where we're joining pieces to together).


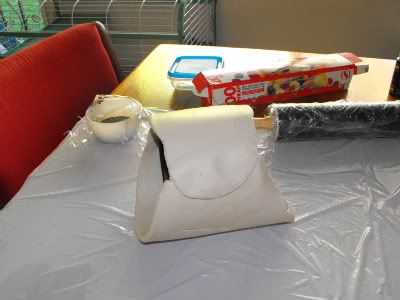
Then I rolled the pipe dealy around on the table to sort of smush the ends down, kind of like another rolling pin action. I didn't take as much time with this as I should have and it came back to haunt me later in the form of over-lumpy areas. Don't do this too much or you'll expand the clay and have to smush it back down anyway, but try to even out the lumpier areas if you can. Don't worry about leaving finger indents, either.


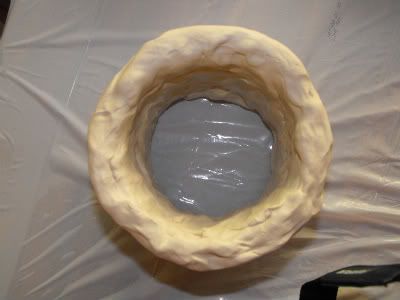
I tucked the edges in all the way around.


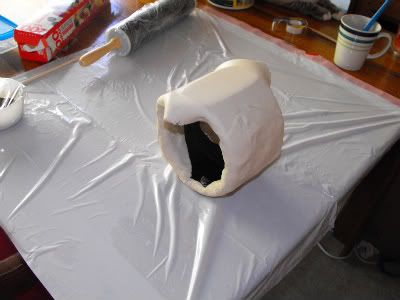
And using extra bits of clay and some brushed-on water, filled in the open spots, mushing it all together really good with my fingers.


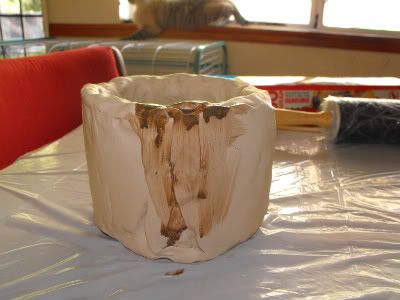
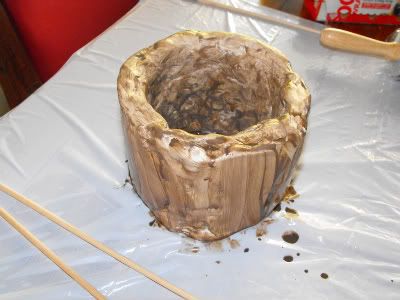
I began to brush the well with my wash. I wish I'd done on the outside what I'd done on the inside-- dabbed instead of stroked. It looked much more natural and "stony" on the inside than the out, which is actually okay since the inside wasn't covered and will be visible.


You can see the differences between the two here.


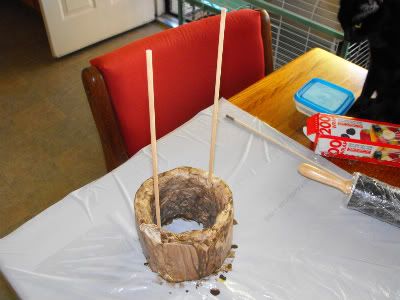
I inserted the dowels directly across from each other into the top of the well, pushing down along the inside wall until I hit the lip across the middle. This lip is a good thing as it will support the dowels from sinking under the weight of the roof in the future. I then mushed the clay around them after standing them as straight as I wanted them, to hold them in place. You will have to adjust these periodically while your well dries. I also re-painted the areas that I had just smashed with my fingers as most of the paint got worked into the clay.

At this point, I un-taped my trash bag from the table and lifted the whole thing onto a lazy susan so I could turn it while I worked. I cut the trash bag into a circle.


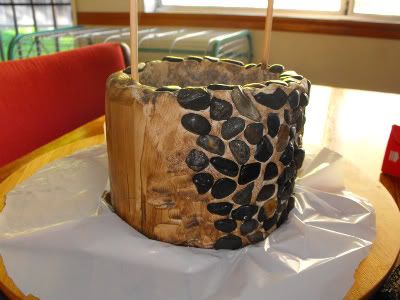
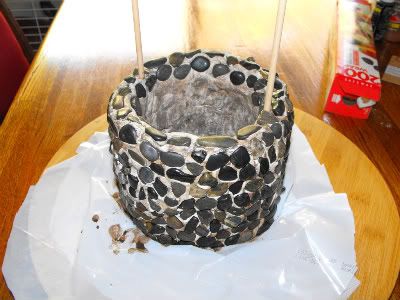
Then I began to cover it in the small river rock pebbles I had bought at Michael's. I only bought one bag, and this was plenty, though I only covered the outside and top of the well. If you were going to cover the whole thing, you might need two. I wish I had spaced the stones closer together to start with. I discovered about 1/3 of the way through that if you pushed the next stone down right onto the edge of a stone already in the clay, it would situate itself just about the perfect distance away. Be sure to push them in firmly, but not so firmly you bury them.


Et voila! Pretty cute, huh? This only took me about an hour. Well, so far. Next up-- making the bucket!

Tips To Learn From My Mistakes:
-Make sure you take the time to evenly coat the pipe dealy in the clay so you don't wind up with lumpy areas.
-Dab the paint wash on instead of brushing it.
-To get a more "even" and natural looking coverage of the rocks, push them in directly next to each other.

I did this about a week ago, and it's still drying. However, it's been pretty rainy and muggy here since. I don't recommend this as a project to do a couple weeks before your wedding. Give it a few to dry, at least.

All photos unless otherwise noted are personal photos.