
This project really wasn't as much of an undertaking as I thought it would be, but-- to be fair-- it still was pretty intense. I understand this has not been an everyone-can-cook sort of tutorial, but I hope someone out there learned something, or is able to re-create these results with minimal trouble. After all, I'm not exactly Martha myself. Yet.
Supplies:
-Everything you've done to the wishing well so far: the well itself on its newly-mossed (yes!) base, the bucket, the roof.
-Another ~7" piece of 1/4" dowel, plus a small scrap (see below)
-Wooden axle pegs (found in the same section I got my wooden circles for the bucket, and here)
-Two more of the wooden circles used to form the base of the bucket
-Cutting mat
-Hobby knife
-Aleene's Fast Grab Tacky craft glue
-Twine or hemp jewelry rope to use as a "rope" for your bucket
-Drill with 1/4" bit
-Dremel with routing bit (?-- this is admittedly the part S. helped me with and therefore, I have no idea what it's actually called) and cutting/ sawing blade
-If you are afraid of power tools like I am, get someone who isn't to help you. Preferably of the fiance-cial persuasion, but only so he gets to help.
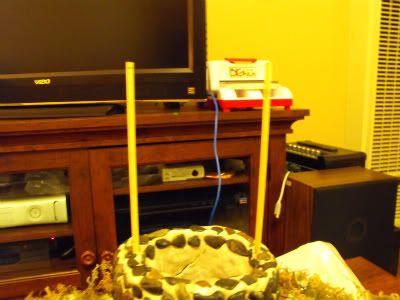
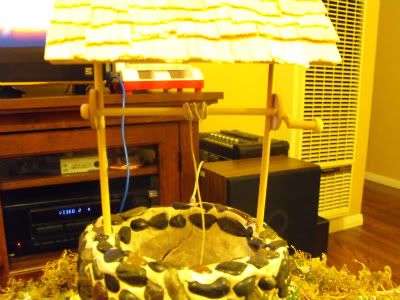
And here we go. Mark the dowels in the well to the same height, leaving enough room to put the roof on and still reach your hand all the way down into the foam pit below (so you can get the wishes out).
Use the Dremel to cut the dowels off at these marks. I recommend some sort of power tool without too much vibration or interference as sawing them by hand could break them out of the clay. The Dremel worked without a snag.
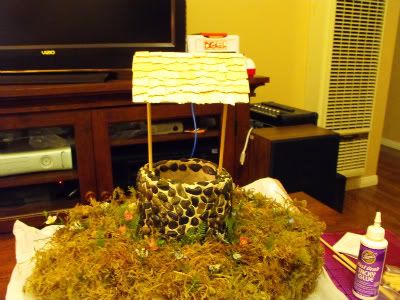
Add some glue into the clay pieces into the roof (you may also have to glue the clay pieces into the roof themselves once they dry-- mine shrank ever so slightly, and therefore needed to be glued). Stick the dowels in and align the roof into its final position.
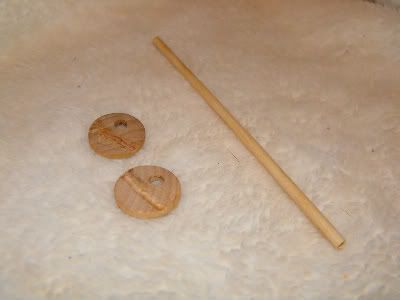
Cut the piece of dowel for the bucket pulley if you haven't already (the 7" piece mentioned above). I also had S. drill a slightly larger than 1/4" hole off-center in two of the same wooden circles as I'd used to make the base for the bucket. I also had him use a routing/ carving bit on his Dremel to carve a channel in them so they would make more contact with the post dowels and be more secure.
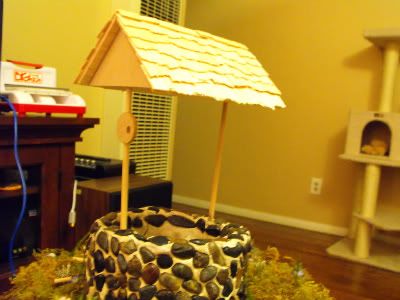
Put glue in the channel and stick the wooden circle to the post until it stays without assistance. Though it's only pictured halfway here, do the same on the other side.
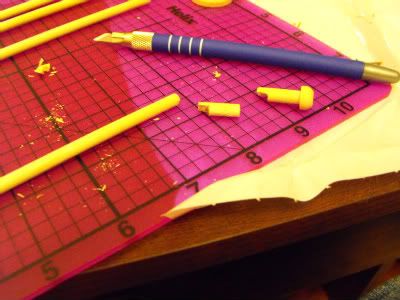
Here you can see I've cut a small piece of dowel (about 1/2-3/4") and notched it. I've also notched an axle peg (the funny little stick with the round button on the end). This is to make a handle so your bucket can be hand-wound. (Warning: you may also want to enlist the power tools to help with this. I used my hobby knife and The Force to do this, but I broke one blade! Be super careful if you go this route, and make sure you have a clear area so you can find the sharp pieces of blade if you do snap one. Wear eye protection, too).
Glue the notch in the short piece of dowel to one end of the long piece of dowel.
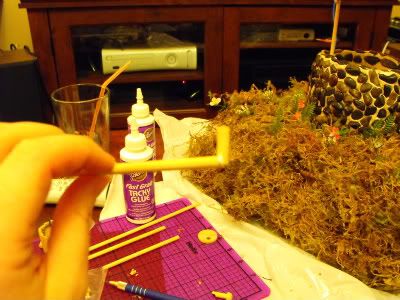
Once it's set, glue the notch in the axle peg to the un-cut end of the short piece of dowel.
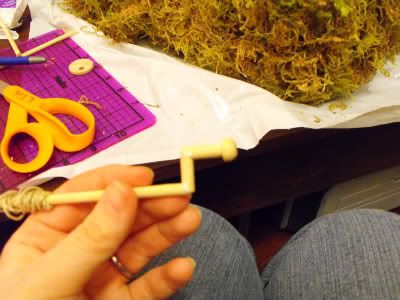
Ta-da! A tiny little crank. In the picture above, you can see I got a little too excited and started to wind my "rope" around the long dowel already. Don't do this.
Once I took the rope back off, I threaded the dowel through the first hole/circle, put the rope back on, and then threaded it through the second. At this point, it was super-loose and waaaay too long. The bucket wouldn't stay up and I was really worried about having to find a way to keep it up artificially.
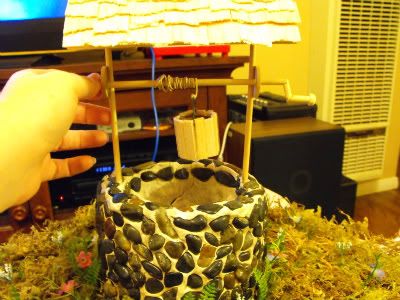
Luckily, I had the brilliant idea to measure and cut the dowel to a more reasonable length (after, yes, taking off the rope and then re-putting-it-back-on again. I'm a dweeb). I also sawed the button off of the end of another axle peg (again, I recommend power tools instead of stupid hobby knife. Stupid hobby knife took me about two years. I am 27 now. Gah.) and glued this to the loose end of the long dowel once it was back through (and the rope was back on, again).
I had to sit and hold this for a good 15-20 minutes and turn it periodically so it wouldn't glue itself in one place, but once it grabbed, it turned out to be perfect! It was just tight enough that the bucket no longer plummets to its doom the instant you stop holding onto the crank-- it now holds itself up.
Ready to check out this uber-cuteness? Here you go!
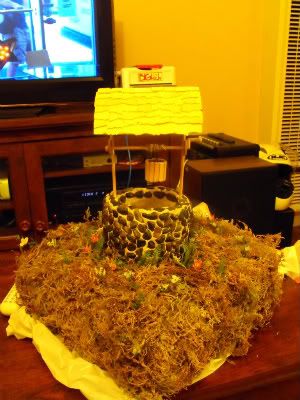
Sorry for the yellow color in the pics-- my camera is an animal unto itself sometimes.
Variations:
I may still do this one: there is the option of spraying all the wood with a varnish or paint wash before you put everything together to give it an older look. I'll do another tutorial if I do this after the fact.
Learn From My Mistakes:
This part went pretty smoothly. I can't really think of anything that made me want to scream or tear my hair out. Except my kittens screaming and trying to tear the moss out of the base... but luckily, I caught them in time.
Do you think you would ever do something this complicated from a tutorial? What do you think of my well? Does the wood need color, or is it okay as-is?

No comments:
Post a Comment